One of the technical challenges in post-production is sharing media between video and audio. Here’s a basic overview of how it works.
Audio on the Picture Side – what is the workflow?
After a production shoot, video (from each camera) and all of the audio mics (captured to a recorder or the camera) are ingested/imported to a drive or server. Audio and video are then combined so the picture editor can see all camera angles and mics together in sync (and in phase). The picture editor then edits with that combined media in a video workstation, such as Avid Media Composer, Apple Final Cut, or Adobe Premiere. Some picture editors leave every mic in their sequence and others choose certain mics (like a line mix), leaving the remaining mics to be sorted through later in the process.
While the project is in editorial, the picture team (picture editor and assistant editors) are doing their own rough mix. They’re picking what mics to listen to, adding and editing music tracks, and adding temp sound fx and temp voice over. These choices aren’t final, but their work does act as a guide for the sound team.
After rounds of picture editing (and approvals), a final version of the picture will be “locked”. This means no further timing changes will be made and the project will be turned over to audio. There’s still changes happening on the video side (adding graphics, visual effects, color correction). When it’s all married back together, the timing should still line up exactly.
What is OMF/AAF?
Since we can’t open audio and video sessions with each other’s software (yet), there’s a couple file formats used to transfer audio between programs: OMF and AAF. The file extensions are .omf or .aaf. AAF is considered the standard format today, although OMF would be used in certain circumstances (such as troubleshooting problems or using older software)
The difference between AAF and OMF is that AAF is a newer format and has some advancements (such as larger file sizes and more metadata).
How to open an OMF (or AAF)
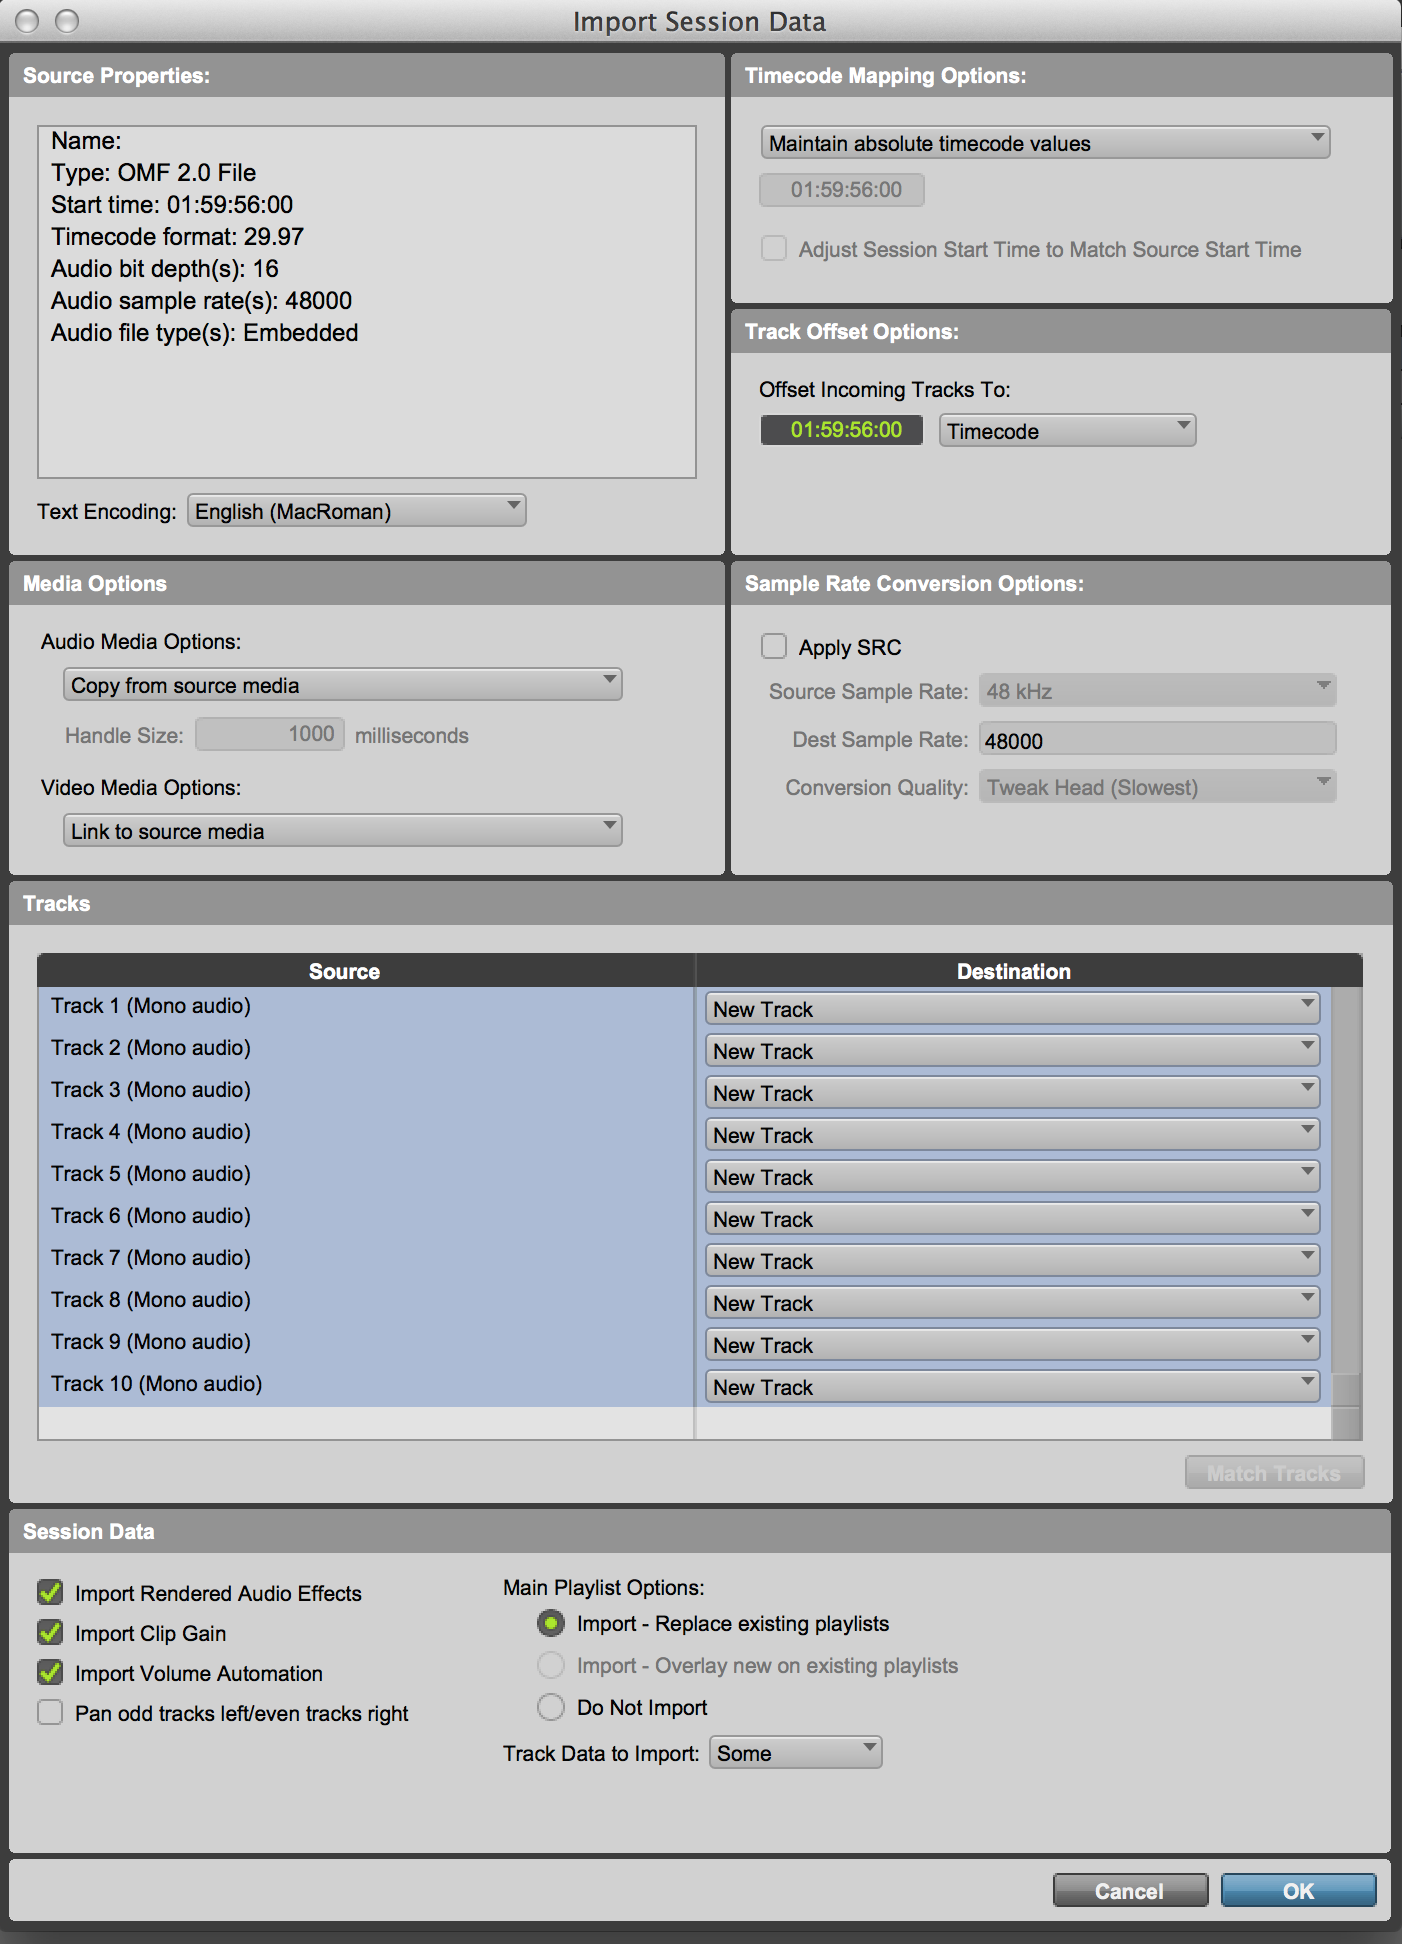
The picture editorial crew (usually an assistant editor) are responsible for outputting materials for audio, which are a reference video (Quicktime) and OMFs (or AAFs) of the locked sequence. When you open (or import) an OMF file with Pro Tools, this is what you’ll see:
How the editor organized it

At this point, you would normally import picture to check if the OMF is in sync and if the two match in length. In this example, we are skipping this step.
Splitting an OMF
One of the first tasks after opening an OMF/AAF is to “split it out,” which means each region needs to be moved to an appropriately labeled track. Before you do anything, make duplicate tracks. If you accidentally move something or delete it you’ll be able to refer back to the original. I usually take the non-duplicates, move them to the end of the session, and make them inactive and hidden.
Splitting is important for organization and also to have each element (dialog, sound fx, music) totally isolated from each other. After splitting out this session (listening to regions to verify where each should go), you can see that all of the dialog is now on tracks labelled DIA, music on MX tracks, and sound fx on SFX:

This is a pretty simple example, but it’s the same process with a bigger project. An OMF could be split into a template that already has dozens (or hundreds) of tracks, auxes, reverbs, output tracks, etc.
It’s important to do the split accurately for a few reasons:
- The sound editor(s) need the proper materials to work with. Often the work is divided between different sound editors (dialog editor, sound fx editor, music editor), so they may miss some regions if the split as errors.
- When the mix is finished, the individual stems will be accurate (voiceover, dialog, music, sound fx, Foley). If it’s not flagged, it can get flagged in QC.
- The split can affect a foreign version because music and sound fx stems combine to create an M&E. If a sound effect is on a dialog track, it won’t get to the M&E. Conversely, if there is dialog on the music tracks, it will be in the M&E, which may get flagged during QC.